
X-ui与宝塔共存无脑教程
##安装宝塔
Centos全新安装命令:根据系统执行框内命令开始安装(大约2分钟完成面板安装)升级后可能需要重启面板
yum install -y wget && wget -O install.sh http://v7.hostcli.com/install/install_6.0.sh && sh install.sh
Debian全新安装命令:
wget -O install.sh http://v7.hostcli.com/install/install-ubuntu_6.0.sh && bash install.sh
Ubuntu/Deepin全新安装命令:
wget -O install.sh http://v7.hostcli.com/install/install-ubuntu_6.0.sh && sudo bash install.sh
Fedora全新安装命令:
wget -O install.sh http://v7.hostcli.com/install/install_6.0.sh && bash install.sh
装完宝塔装一下宝塔的建站LNMP
##安装X-ui FranzKafkaYu版本
2022.08.11:实现Vmess/Vless/Trojan单端口多用户;增加CPU使用超限提醒 2022.07.28:增加acme standalone模式申请证书;增加x-ui自动保活机制;优化编译选项以适配更多系统 2022.07.24:增加自动生成面板根路径,节点流量自动重置功能,设备IP接入变化通知功能 2022.07.21:增加节点IP接入变化提醒,Web面板增加停止/重启xray功能,优化部分翻译 2022.07.11:增加节点到期提醒、流量预警策略,增加Telegram bot节点复制、获取分享链接等 2022.07.03:重构Telegram bot功能,指令控制不再需要键盘输入;增加Trojan底层传输配置 2022.06.19:增加Shadowsocs2022新的Cipher,增加节点搜索、一键清除流量功能 2022.05.14:增加Telegram bot Command控制功能,支持关闭/开启/删除节点等 2022.04.25:增加SSH登录提醒、面板登录提醒 2022.04.23:增加更多Telegram bot提醒功能 2022.04.16:增加面板设置Telegram bot功能 2022.04.12:优化Telegram Bot通知提醒 2022.04.06:优化安装/更新流程,增加证书签发功能,添加Telegram bot机器人推送功能 Telegram
###一键安装 在安装前请确保你的系统支持bash环境,且系统网络正常 ⚡从原版升级也可使用该命令,数据不会丢失⚡
bash <(curl -Ls https://raw.githubusercontent.com/FranzKafkaYu/x-ui/master/install.sh)
安装完全后宝塔安全界面放行x-ui端口,我的为54857

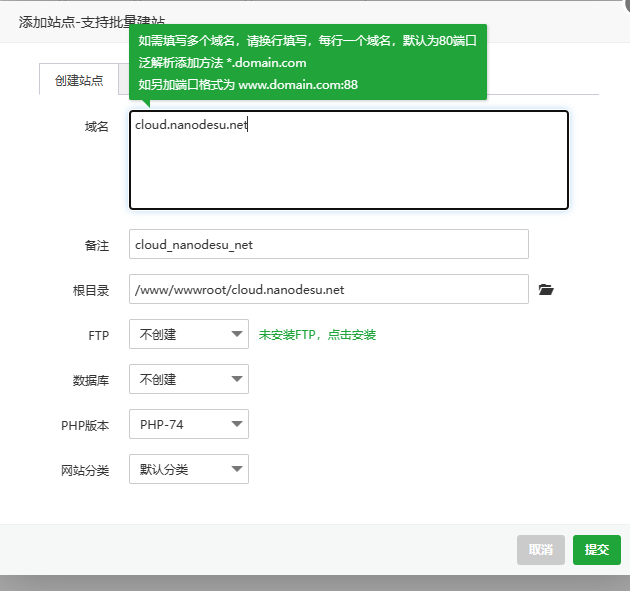
###新建站点
站点DNS解析,新建站点
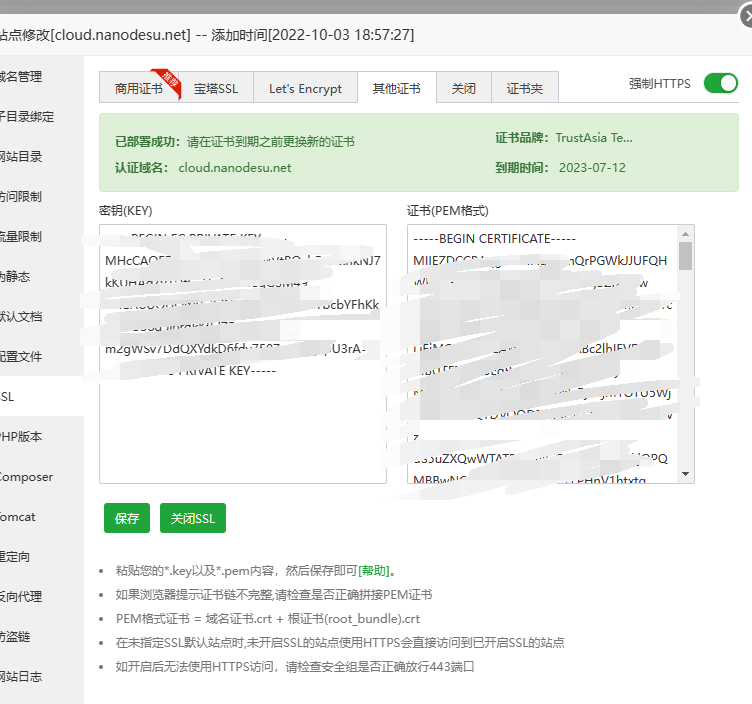
###绑定证书
添加SSL证书
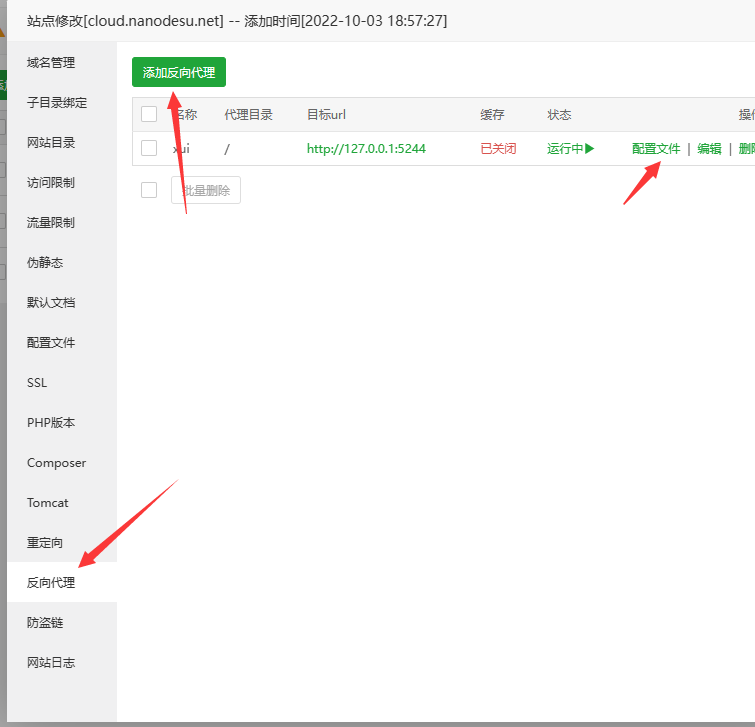
##反向代理 添加反向代理,随便填一点东西,然后保存 在反向代理主界面点击配置文件,先清空配置文件 然后把以下代码复制到配置文件,保存
location ^~ /qwq {
    proxy_pass http://127.0.0.1:54857/qwq;
    proxy_set_header Host $host;
    proxy_set_header X-Real-IP $remote_addr;
    proxy_set_header X-Forwarded-For $proxy_add_x_forwarded_for;
}
location /emo {
        proxy_redirect off;
        proxy_pass http://127.0.0.1:58659;
        proxy_http_version 1.1;
        proxy_set_header Upgrade $http_upgrade;
        proxy_set_header Connection "upgrade";
        proxy_set_header Host $http_host;
        proxy_read_timeout 300s;
        # Show realip in v2ray access.log
        proxy_set_header X-Real-IP $remote_addr;
        proxy_set_header X-Forwarded-For $proxy_add_x_forwarded_for;
  }
  location / {
    proxy_set_header X-Forwarded-For $proxy_add_x_forwarded_for;
    proxy_set_header Host $http_host;
    proxy_set_header X-Real-IP $remote_addr;
    proxy_set_header Range $http_range;
    proxy_set_header If-Range $http_if_range;
    proxy_redirect off;
    proxy_pass http://127.0.0.1:56854;
    # 上传的最大文件尺寸
    client_max_body_size 20000m;
}
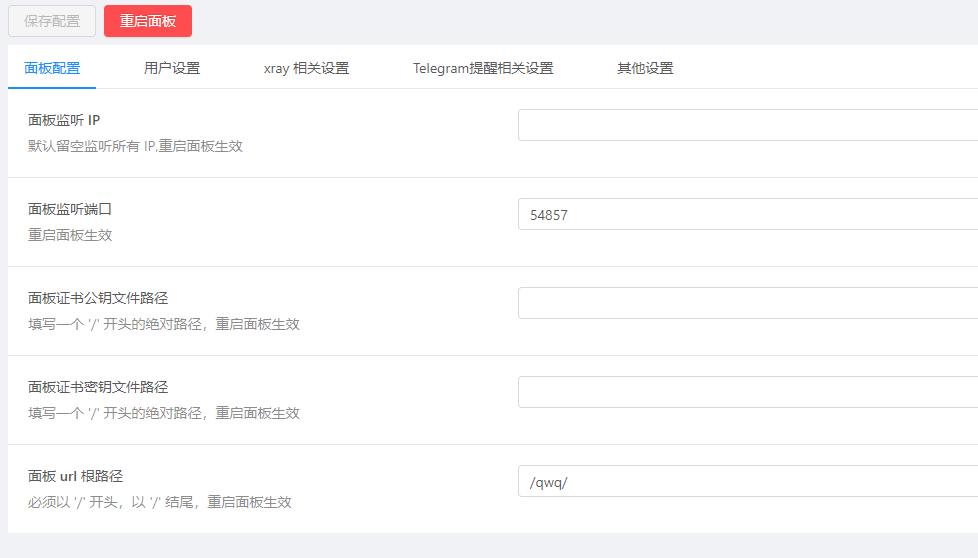
##X-ui配置路径
###面板路径
端口54857
路径/qwq/
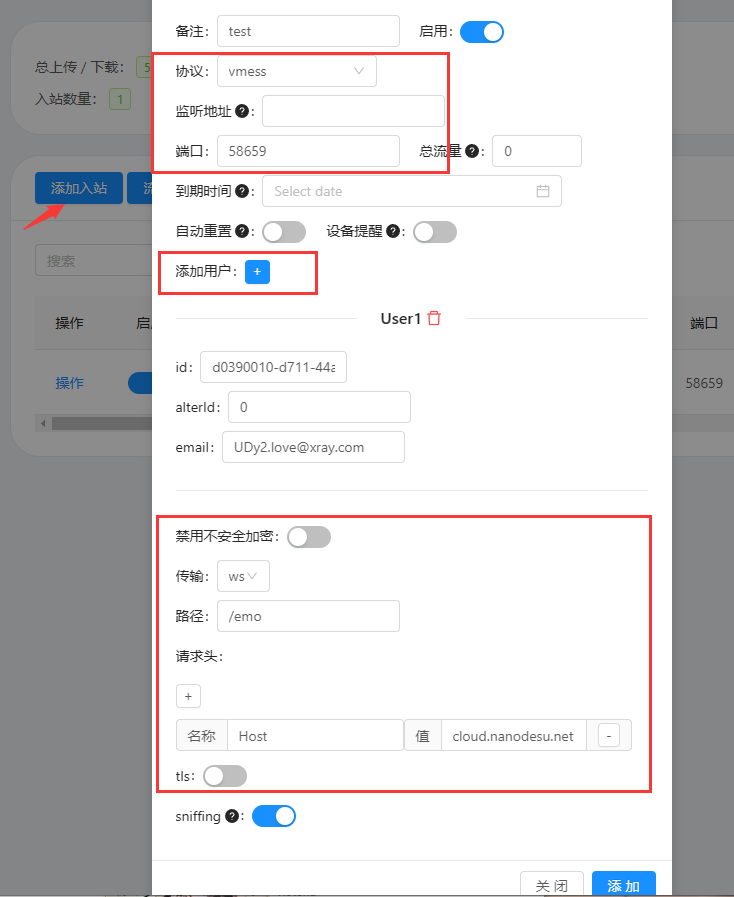
###添加入站设置
协议选择Vmess,端口58659,这个跟你你nginx配置文件来,添加个用户
传输选择ws,tls关闭,因为宝塔的nginx接管了tls
路径/emo,这个也是根据你的nginx配置文件来的
##反向代理Alist伪装 仅支持Linux-x86_64/aarch64平台。
一键脚本
curl -fsSL "https://alist.nn.ci/v2.sh" | bash -s install
更改Alist的默认端口
vim /opt/alist/data/config.json
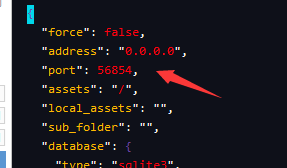
esc :wq
保存退出,重启Alist
systemctl restart alist.service
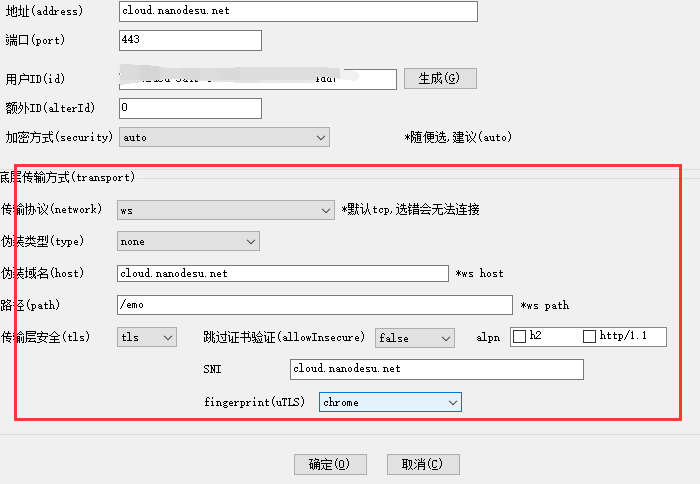
##客户端配置
跟着图片改就行了
*fingerprint(utls)*改成chrome
评论