
写一篇OpenClash对接AdGuard Home [覆写模块]
OpenClash + AdGuard Home 覆写模块 DNS 重定向设置
转载请注明出处。本文链接https://nanodesu.net/archives/73/
本教程旨在通过 OpenClash 的覆写模块功能,将 DNS 流量重定向到 AdGuard Home 的指定端口,以实现更灵活的 DNS 管理。
版本要求
- OpenClash 内核版本:
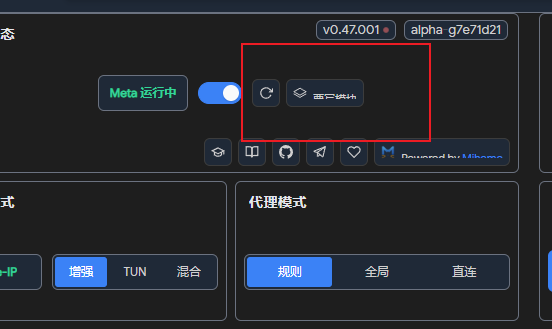
[Meta] alpha-g7e71d21或更高 - OpenClash 客户端版本:
v0.47.001或更高
注意: 低于上述版本,可能没有覆写模块按钮。
第一步:设置 OpenClash 覆写模块
-
在 OpenClash 界面中,找到并点击 “覆写模块” 按钮。
-
在弹出的代码编辑框中,粘贴以下代码:
#!/bin/sh
. /usr/share/openclash/ruby.sh
. /usr/share/openclash/log.sh
. /lib/functions.sh

# This script is called by /etc/init.d/openclash
# Add your custom overwrite scripts here, they will be take effict after the OpenClash own srcipts

LOG_OUT "Tip: Start Running Custom Overwrite Scripts..."
LOGTIME=$(echo $(date "+%Y-%m-%d %H:%M:%S"))
LOG_FILE="/tmp/openclash.log"
#Config Path
CONFIG_FILE="$1"

#Ruby Script Demo:
ruby -ryaml -rYAML -I "/usr/share/openclash" -E UTF-8 -e "
      begin
        Value = YAML.load_file('$CONFIG_FILE');
      rescue Exception => e
        puts '${LOGTIME} Error: Load File Failed,【' + e.message + '】';
      end;

      #General
      begin
      Thread.new{
        Value['dns']['default-nameserver'] = ['127.0.0.1:5553'];
        Value['dns']['nameserver'] = ['127.0.0.1:5553'];
        Value['dns']['proxy-server-nameserver'] = ['127.0.0.1:5553'];
      }.join;

      rescue Exception => e
        puts '${LOGTIME} Error: Set General Failed,【' + e.message + '】';
      ensure
        File.open('$CONFIG_FILE','w') {|f| YAML.dump(Value, f)};
      end" 2>/dev/null >> $LOG_FILE

exit 0
这段代码的作用是将 OpenClash 配置中的 DNS 设置,强制指向
127.0.0.1:5553,即 AdGuard Home 的 DNS 监听端口。
第二步:设置 AdGuard Home
- 登录 AdGuard Home 管理界面。
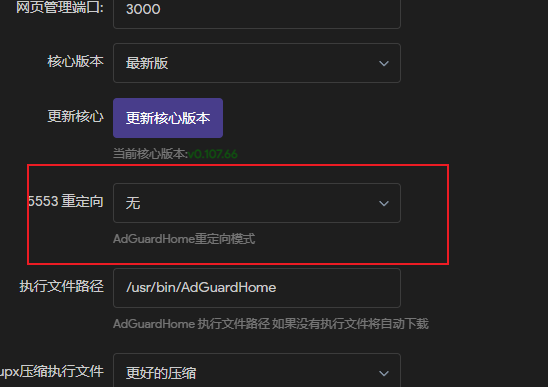
- 进入 “设置”,找到 “DNS 设置” 选项。
- 在 “重定向” 选项中,选择 “无”。
原理简述
- Dnsmasq 端口占用: 通常,路由器上的 Dnsmasq 服务会占用 53 端口。
- OpenClash 劫持: OpenClash 会劫持 Dnsmasq 的流量,并将其重定向到自己的 DNS 监听端口(默认为 7874)。
- 覆写模块重定向: 我们通过上述代码,利用覆写模块功能,进一步将 OpenClash 的 DNS 流量重定向到
127.0.0.1:5553,也就是 AdGuard Home 的 DNS 端口。 - AdGuard Home 设置: AdGuard Home 的“重定向”选项设置为“无”,是因为 DNS 流量已经通过 OpenClash 的覆写模块,直接精准地被导向了 AdGuard Home 的监听端口,无需再进行额外的重定向配置。
通过以上步骤,你就成功地将 OpenClash 的 DNS 流量导向了 AdGuard Home,实现了更精细的广告过滤和 DNS 管理。
评论